Step 4: Panel Configuration
🎯 Prerequisites
Make sure you have followed and completed step 3 regarding panel installation before continuing.
1. Panel Login 🔐
- Access your panel URL
- Log in with your administrator credentials
2. Main Configuration 🎯
Azuriom Site URL
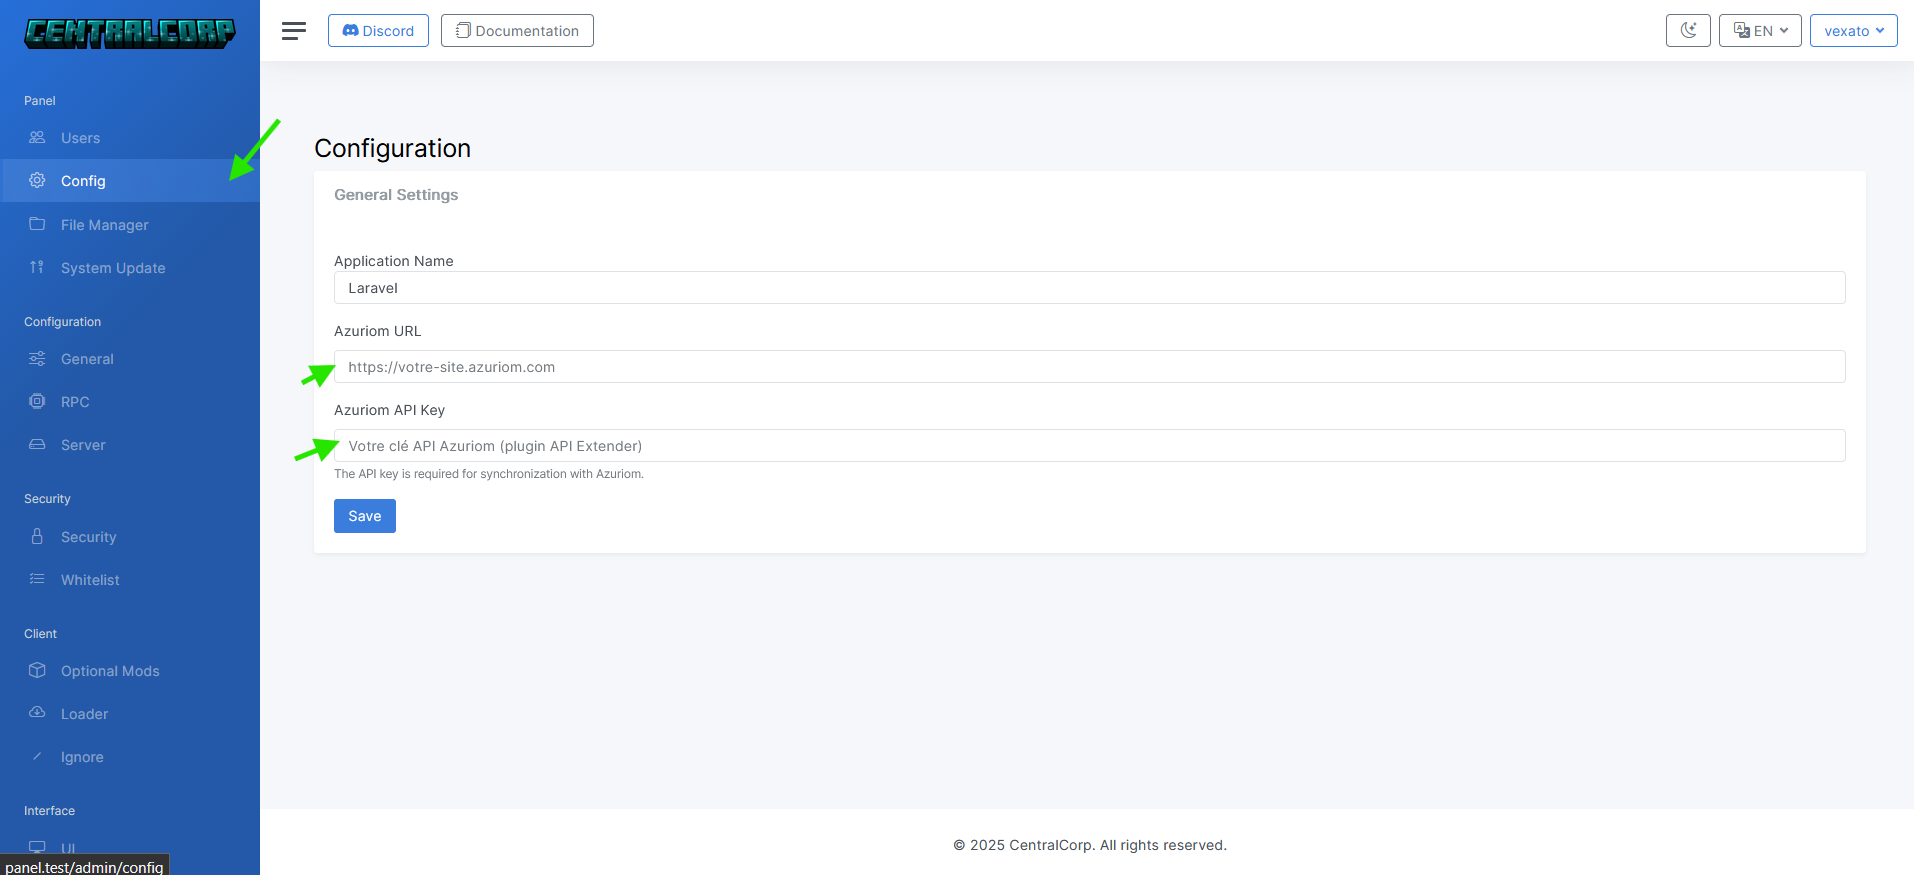
⚠️ Important Format
The URL must be entered without trailing slash:
- ✅
https://yoursite.com - ❌
https://yoursite.com/
The API Key can be retrieved from your Azuriom site in the API-extender plugin.
4. File Management 📁
Via Panel
Access the panel file manager: 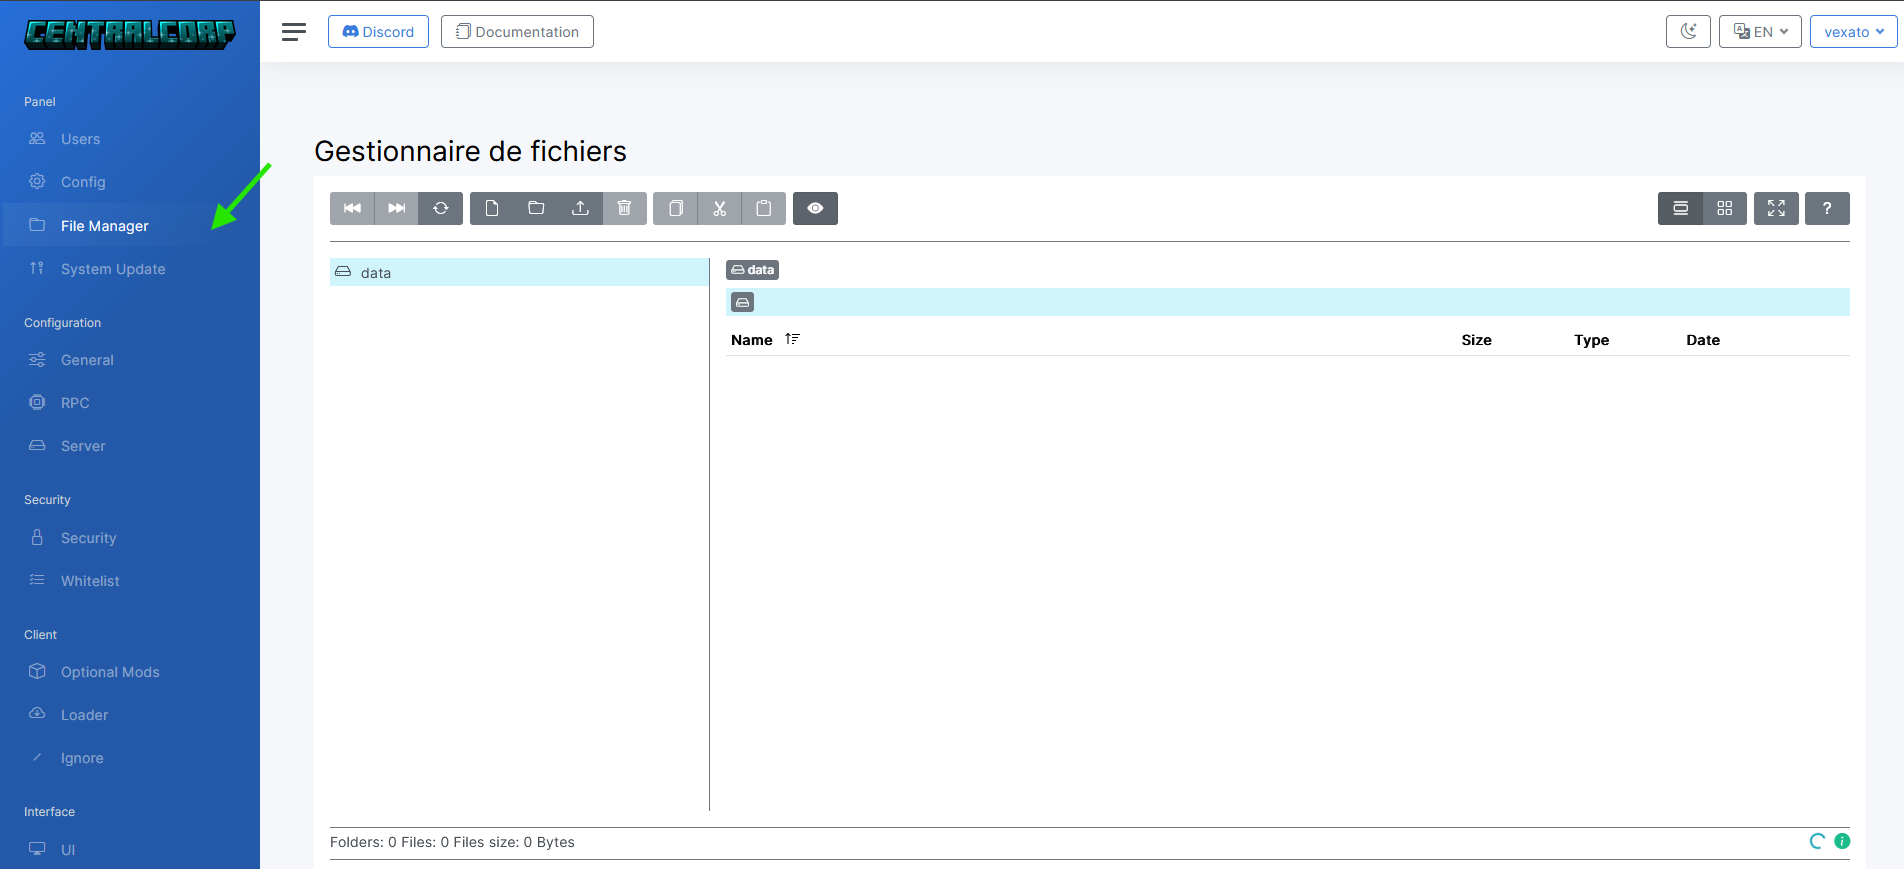
plaintext
/
├── mods/          # Your Minecraft mods
├── config/        # Configuration files
└── resources/     # Custom resources
Via Azuriom Plugin
Access the FileManager plugin and open the data folder:
plaintext
/data
├── mods/          # Your Minecraft mods
├── config/        # Configuration files
└── resources/     # Custom resources
✅ Automatic Sync
All files placed in these directories will be automatically downloaded by your players when launching.
Let's Test the Launcher 🧪
Once you're here, you can try launching the launcher locally, run in the same terminal as step 2:
bash
npm run dev